
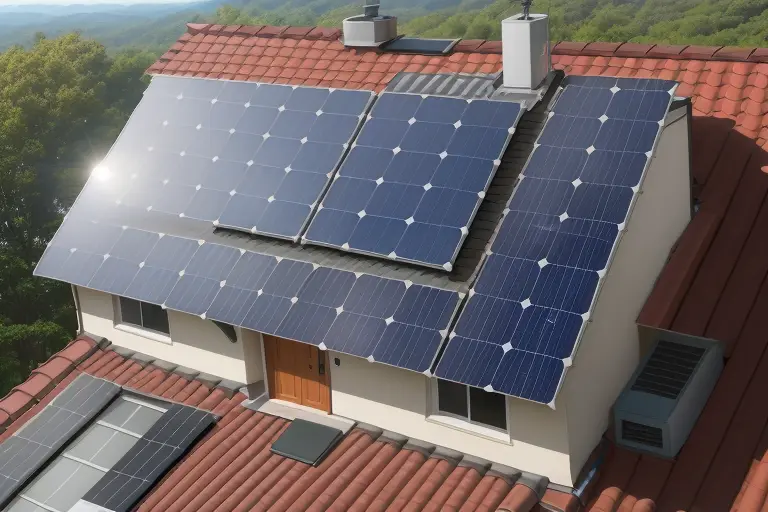
How to Install Solar Panels on Roof?
So, you’ve decided that a solar panel system is a worthy investment for you, counted all the numbers, and chose the right model. The next question is how to install solar panels on the roof. Different roofs require different approaches, and in this article, we’ll look closely at the procedure of installing solar panels on different kinds of them.
Things to Consider Before Installing Solar Panels On Roof
Calculate Your Energy Needs
Understanding your energy consumption is crucial in determining the size and number of solar panels required for your installation.
Key Steps:
Review Your Electricity Bills: Examine your past electricity bills to understand your average monthly usage. This information will help you estimate your energy needs and find out how many solar panels are required.
Consider Future Energy Needs: Consider any changes in your energy consumption, such as adding new appliances or expanding your living space. This foresight will help you plan for the future.
Calculate the Number of Panels Required: Based on your energy needs and the efficiency of the solar panels you choose, calculate the number of panels required to meet your electricity demand.
Choose the Right Solar Panels
Choosing the right solar panels is a critical decision considering efficiency, warranty, and aesthetic appeal factors.
Tips:
Opt for High-Efficiency Panels: Higher-efficiency panels generate more electricity in the same space, making them a wise choice for roofs with limited space.
Consider the Warranty Period: Look for solar panels with a reliable warranty. This ensures you’re protected against manufacturing defects or performance issues over the years.
Choose Panels That Complement Your Roof’s Aesthetics: If aesthetics are important to you, consider solar panels that blend well with the architectural style of your home.
Obtain Necessary Permits
Before installing solar panels, you must comply with local regulations and obtain the required permits.
Steps:
Contact Local Authorities: Contact your local municipality or relevant authorities to understand the permitting process and requirements.
Submit Necessary Documents: Prepare and submit all necessary documents, including your solar panel system design and specifications.
Obtain Permits: Once your documentation is in order, secure the required permits before commencing the installation. Please obtain permits to avoid legal issues and fines.
Roof Preparation
Prepare your roof to provide a secure foundation for the solar panels. A well-maintained roof ensures longevity and optimal performance.
Steps:
Clean Debris and Dirt: Clear your roof of any debris or dirt that may interfere with the installation process or damage the panels over time.
Repair Any Roof Damage: Address any existing roof damage to prevent leaks and ensure the structural integrity of the installation.
Install Roof Flashings: Install roof flashings around the edges of the solar panels to create a watertight seal and protect against leaks.
Install Mounting Hardware
Mounting hardware serves as the foundation for your solar panels. Follow the manufacturer’s instructions for proper installation.
Guidelines:
Use Appropriate Mounts for Your Roof Type: Different roofs require different mounting systems. Ensure you’re using mounts suitable for your roof type.
Ensure Mounts Are Securely Attached: Properly secure the mounting hardware to the roof to withstand wind loads and other environmental factors.
Follow Recommended Spacing Guidelines: Adhere to the spacing guidelines to prevent shading between panels and optimize
Assess Your Roof
The best place to put your solar panels is on top of your house since it doesn’t get used for much else. It’s possible to put your panels on the ground when you can’t have a roof. This method of installation has some problems:
- They get dirty more quickly.
- They take up more room in your yard.
- Shadows from trees, bushes, or buildings can damage them more often than those installed on the roof.
You could also attach solar panels to walls, but that would make the system more expensive and less effective.
Considerations
You need to ensure that your roof can hold the weight of the solar panels before you put them up. There are about 2.5 to 2.7 pounds of weight per square foot for a monocrystalline or polycrystalline panel. While solar panels don’t damage the roof, it is best to have a professional engineer take a look just to be safe. This is especially important if you live in an old house. You can add more support, even if a professional isn’t happy with the roof’s state.
Remember that if you ever want to replace the roof, you must remove the panels that were put on. These panels are meant to last at least 25 years. If your want to install solar panel on flat, clean it up before the installation. Please get rid of any trash or plants that are on it.
Mounts Can Be Put On Rafters
In most cases, solar panels are put on the roof with the help of mounts that are connected to the ceiling with stanchions, which are big screws. Putting them on the roof’s rafters, which you can find with the help of its plans, is the easiest thing to do.
Two stanchions must be at least four feet apart. Once the holes are made, you can use an impact driver to mount the screws and keep them in place. Don’t forget to close the screws so that heat doesn’t escape through the holes you just made. Thermoseal roofing is the best material for this job.
Putting up solar panels is something you should do right the first time because you won’t get a second chance. It would help if you tried to get everything right the first time. Check the screw’s length and width twice. If you want to be sure that the side rails you just put in are straight, compare the diagonals: Find out how far apart the top and bottom of each rail are, then switch them and compare. The rails are horizontal if their lengths and widths are the same. If they aren’t, make the changes that are needed. The middle rail can then be put in place. After that, remember to check it’s straight.
After that, you can either place the solar panels or connect the wires to them first, depending on what you need to do. Solar panels have wires that connect to solar inverter kits, which should be put under the panels. For inverters, you’ll need a 6-gauge copper grounding wire. Wires can be plugged into the electricity meter and sub-panel once the whole system on the roof is linked. So there you have it your solar panel setup for your home.
Putting solar panels on a roof isn’t rocket science, but it is a dangerous job that must be done carefully and quickly. It is best to hire a skilled crew to help with the installation. Be careful not to hurt yourself, the roof, or the panels if you want to do everything yourself.
Some Roofs Need A Different Approach
Most of the time, solar panels are put on the roof with the help of mounts that are attached to the ceiling with long screws called stanchions. With the plans, you can find the rafters of the roof and put them there. This is the easiest thing to do.
There needs to be at least four feet between the two posts. You can use an impact driver to put the screws in place and keep them there after the holes are made. Don’t forget to tighten the screws again so the heat doesn’t escape through the new holes. The best thing for this job is thermoset roofs.
When you put up solar panels, you should do it right the first time because you won’t get another chance. Try to do everything right the first time. Double-check the screw’s length and width. Check the diagonals to ensure the straight side rails you just put in. Find out how far apart the top and bottom of each rail are. Then, switch them around and look at the differences. If the rail’s lengths and widths are the same, they are level. Change what needs to be changed if they aren’t. After that, the middle rail can be put in place. After that, make sure it’s still straight.
Based on what you need to do next, you can put the solar panels in place or connect the lines to them first. Solar panels have wires that link to solar inverter kits, which need to be put under the panels. To ground a transformer, you’ll need copper wire that is 6 gauge. Once the whole system on the roof is connected, wires can be put into the meter and sub-panel. Here it is your own set of solar panels for your house.
It’s easy to put solar panels on a roof, but you must be careful and do it quickly because it is dangerous. The best thing to do is to hire a skilled crew to help you set up. If you want to do everything yourself, watch out not to hurt yourself, the roof, or the panels.
Test and Monitor the System
After the installation, testing the system and setting up monitoring tools for long-term performance tracking is essential.
Key Checks:
Verify Proper Power Generation: Confirm that your solar panels are generating the expected amount of power based on your calculations.
Monitor for Any Issues: Monitor the system for potential issues such as shading, malfunctioning components, or reduced efficiency.
Set Up a Regular Maintenance Schedule: Establish a routine maintenance schedule to clean the panels and check for any wear and tear that may affect performance.
How Does Severe Weather Affect Solar Panels?
If you want to know if you should worry about your solar panels in lousy weather, the short answer is no, but only because of certain limits. Standard Test Conditions (STC) are used to test every type of solar panel. A module is tried to see how well it works and how well it can handle big hail and strong winds. If the panels are placed correctly, they should be able to handle wind speeds of up to 120 mph, and hail at speeds of up to 30 m/s shouldn’t hurt them either. If anything, solar panels protect your roof from water, which makes it last longer. Rain cleans solar panels most of the time, but you should clean them once a year, or they might lose some effectiveness over time.
Conclusion
Embarking on the journey of installing solar panels on your roof requires careful planning and consideration of various factors. Assessing your roof, calculating energy needs, choosing the right panels, obtaining necessary permits, preparing the roof, installing mounting hardware, and testing the system can successfully harness the power of the sun. Remember that safety is paramount, and if you need more clarification on any aspect of the installation, seek professional assistance. With solar panels in place, you’re contributing to a sustainable future and enjoying the long-term benefits of reduced energy costs and environmental impact.